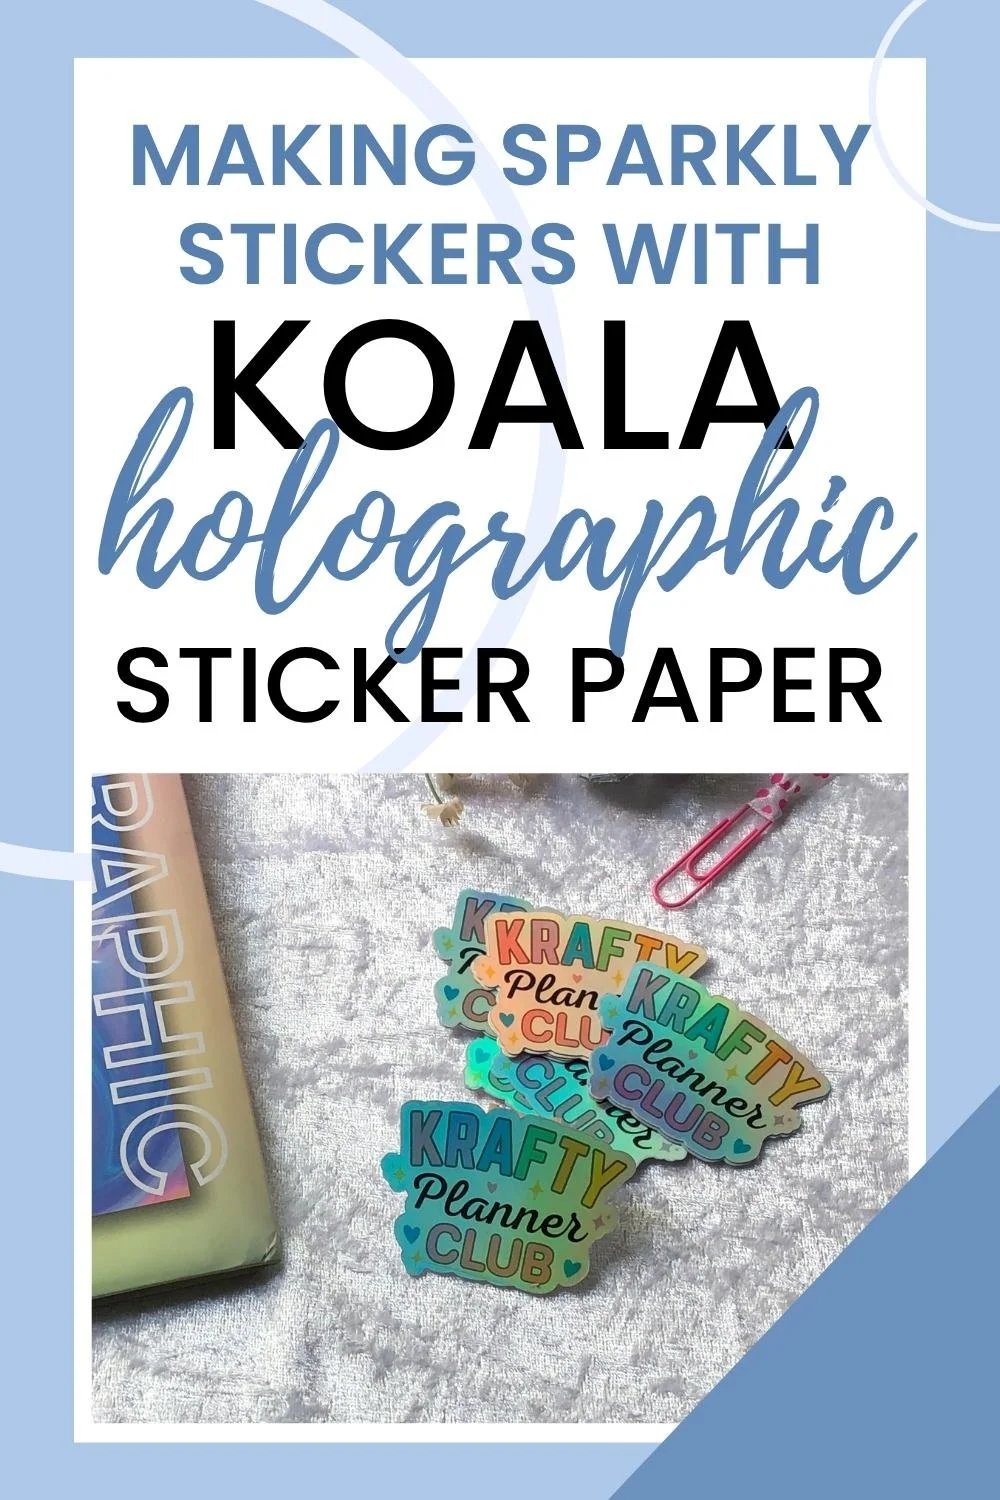
Making Sparkly Stickers with Koala Holographic Paper

I’ve been playing around with some fun new supplies lately, and I have to tell you about the Koala Holographic Printable Vinyl Sticker Paper. It is seriously magical!
First off, a big thank you to Koala for sending me this gorgeous sticker paper to try. The second I opened the package, I was totally mesmerized by the gorgeous rainbow shimmer. I couldn’t wait to dive in and start making something special!
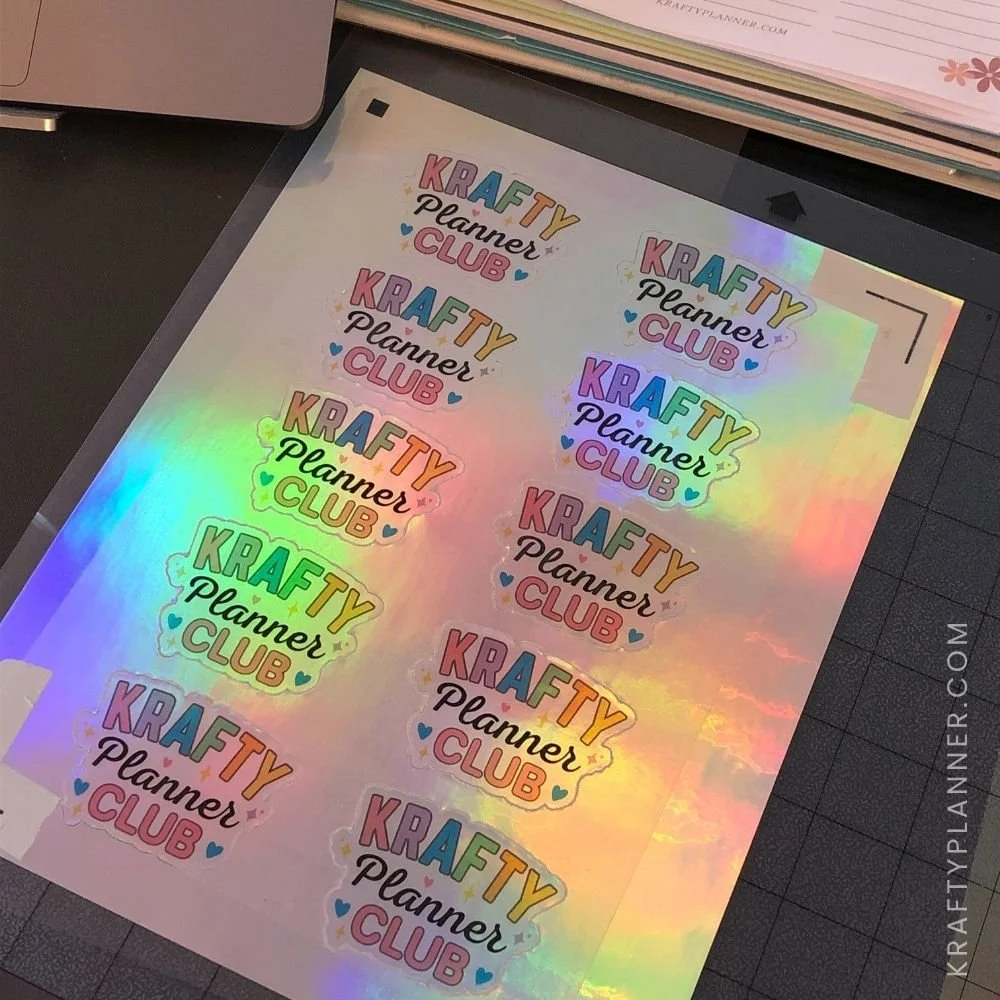
So, of course, I whipped up a fresh set of Krafty Planner Club stickers to share with my members—and I’m so excited with how they turned out!
These designs are extra special because they’re exclusive to the club (spoiler alert: they’re going out in the next happy mail package, but shh... don’t tell the members yet!).
I can’t wait for them to see these stickers in person, and I hope they love them as much as I loved making them.
What Stickers Did I Make?
For this project, I wanted to keep things fun, colorful, and full of personality. Here’s a little sneak peek at what I created:

Aren’t they the cutest? They’re playful, practical, and full of positive vibes—exactly what I love to add to my planner.
If you want to grab some of this beautiful holographic paper for yourself, Koala has been kind enough to share a discount code just for you—use KRAFTYPLANNER for 12% off your order.
How I Made The Stickers
Here’s a quick run-through of my process:
Designing – I created the design in Canva, keeping it fun and colorful, then saved everything as a high-res PNG file. After that, I created the cut file in Silhouette Studio so the machine knows where to cut.
Printing – I loaded the Koala Holographic paper into my inkjet printer and hit print. I was so impressed with how the colors popped against that holographic background—seriously dreamy!
Dry Time – This is key! I let the ink dry for about 30 minutes before doing anything else. Trust me, it’s worth the wait.
Laminating (Optional) – I decided to add a layer of clear self-adhesive laminate over the top to make the stickers extra durable and glossy. This step isn’t totally necessary, but it gives them an extra layer of protection—and I’m all about the shiny, sparkly finish.
Cutting – I used my Silhouette machine to cut them out. The first couple of tries were a bit of trial and error (as always), but once I found the right settings, it worked like a charm.
Pro Tip: If you’re using a Silhouette cutting machine and the holographic paper is too shiny (or if you’ve laminated over the registration marks), try placing a small piece of matte tape over the marks. This helps the machine read them more easily and ensures a perfect cut every time!
Peeling & Sticking – My favorite part! There’s something so satisfying about peeling up a fresh sticker, especially when it’s sparkling with a rainbow holographic finish.
Here's a look at my process…
Final Thoughts
I’m so happy with how these stickers turned out, and the Koala Holographic Sticker Paper made it super easy to create something special.
The shimmer is next level, and it adds such a fun touch to my planner pages. If you’re a sticker lover (or just love a little extra sparkle in your life), I totally recommend giving it a try!
You can grab your own Koala paper at koalagp.com, and don’t forget to use code KRAFTYPLANNER for 12% off your order.
Have you ever tried holographic sticker paper?
I’d love to hear about your projects! Let me know in the comments or tag me on Instagram @thekraftyplanner so I can see what you’re working on.
BEFORE YOU GO:
Here are a few more posts you might like:
See my Link Party Directory for a current list of blog parties I attend each week.
FOR PERSONAL USE ONLY – Please Read Freebies Terms of Use.
(This post may contain affiliate links. For more information, see my disclosures here.)
~ SHARE THIS POST ~
Did you like this post? Do you know someone else who might enjoy it? Please take a minute to share it on Pinterest, Facebook, or your favorite social media… Thank you!