
How to Set Up Giant Advertising Inflatables Safely at Outdoor Events

Giant advertising inflatables grab attention from a distance, but a poorly set-up inflatable can become a serious hazard in seconds. Whether you are placing a towering product replica outside a storefront or anchoring an arch at a festival, the setup process matters just as much as the design itself.
Get it right, and your inflatable draws crowds all day.
Get it wrong, and you risk property damage, injuries, or a deflated display at the worst possible moment.
This guide walks you through every step of a safe, professional setup from location selection to weather monitoring.
Choosing the Right Location for Your Giant Inflatable
Location is the first decision you make, and it shapes every other part of your setup. A visually prominent spot is only a good choice if the ground, the surrounding space, and the overhead clearance all support a large custom advertising inflatable, such as these https://custominflatables.com/pages/custom-advertising-inflatables, safely.
Overhead Clearance and Obstacle Awareness
Before you unpack anything, look up. Power lines, tree branches, awnings, and roof overhangs are all hazards that an inflatable can contact as it rises. Measure the full height of your inflatable and add at least 10 feet of buffer above that measurement. Even if the structure seems clear at ground level, wind can push an inflatable sideways, so lateral clearance matters too.
Identify any fixed obstacles within a radius equal to the height of your inflatable and adjust your placement accordingly.
High-Traffic Visibility vs. Pedestrian Safety
You want your inflatable where people can see it, but high-visibility areas are often high-traffic areas too. Place the inflatable far enough from walkways, entrances, and vendor areas so that a sudden deflation or movement does not endanger bystanders.
A good rule of thumb is to keep a buffer zone around the base equal to at least half the inflatable's height. This space also gives staff room to monitor and manage the setup throughout the event.
Surface Type and Stability Considerations
Not every surface supports an inflatable equally. Grass and compacted soil are ideal because they accept ground stakes cleanly and provide solid resistance. Asphalt and concrete require weighted bags or frame anchors instead, which changes your anchoring plan entirely.
Avoid setting up on gravel, loose sand, or uneven terrain unless you have specialized anchoring equipment.
Soft or waterlogged ground can cause anchor points to shift, so check soil conditions the day before and again on the morning of the event.
Pre-Setup Inspection and Ground Preparation
A thorough inspection before inflation catches problems that become serious incidents after inflation. Do not skip this step, even if you have used the same inflatable dozens of times before.
Checking the Inflatable for Damage or Wear
Spread the inflatable flat on a clean surface and examine every seam, patch, and attachment point.
Look for fraying at tether loops, small punctures along seams, and any signs that a previous repair is lifting.
Run your hand along the fabric to feel for thinning material. If you spot a compromised seam or a loose D-ring, do not inflate the unit until the repair is complete. A small tear under pressure can expand rapidly, and a D-ring failure under wind load can release an anchor line with enough force to injure someone nearby.
Inspecting Blower Equipment Before Use
The blower is the heart of the operation. Check the power cord for cuts, fraying, or exposed wiring before you connect it to any power source.
Inspect the fan housing for cracks and confirm that the intake screen is free of debris.
Test the blower away from the inflatable first to verify it runs at the correct speed without unusual sounds.
Use a properly rated outdoor extension cord if the power source is not close to your setup area, and keep all electrical connections off the ground to avoid water contact.
Clearing and Leveling the Setup Area
Remove rocks, sharp objects, broken glass, and any debris from the footprint area before you lay the inflatable down. Even small stones can puncture the base material under the weight of a fully inflated structure.
If the ground has a noticeable slope, note which direction water would drain during a rain event, because pooled water around anchor points weakens their hold.
A level, clean surface also makes it easier to position the inflatable accurately and to run tether lines at the correct angles for maximum stability.
Anchoring and Securing Methods That Actually Work
No matter how well you inflate your giant advertising inflatable, it will not stay safe without proper anchoring. The right method depends on your surface type, the size of the inflatable, and the expected wind conditions.
Stakes, Tether Lines, and Weighted Bags
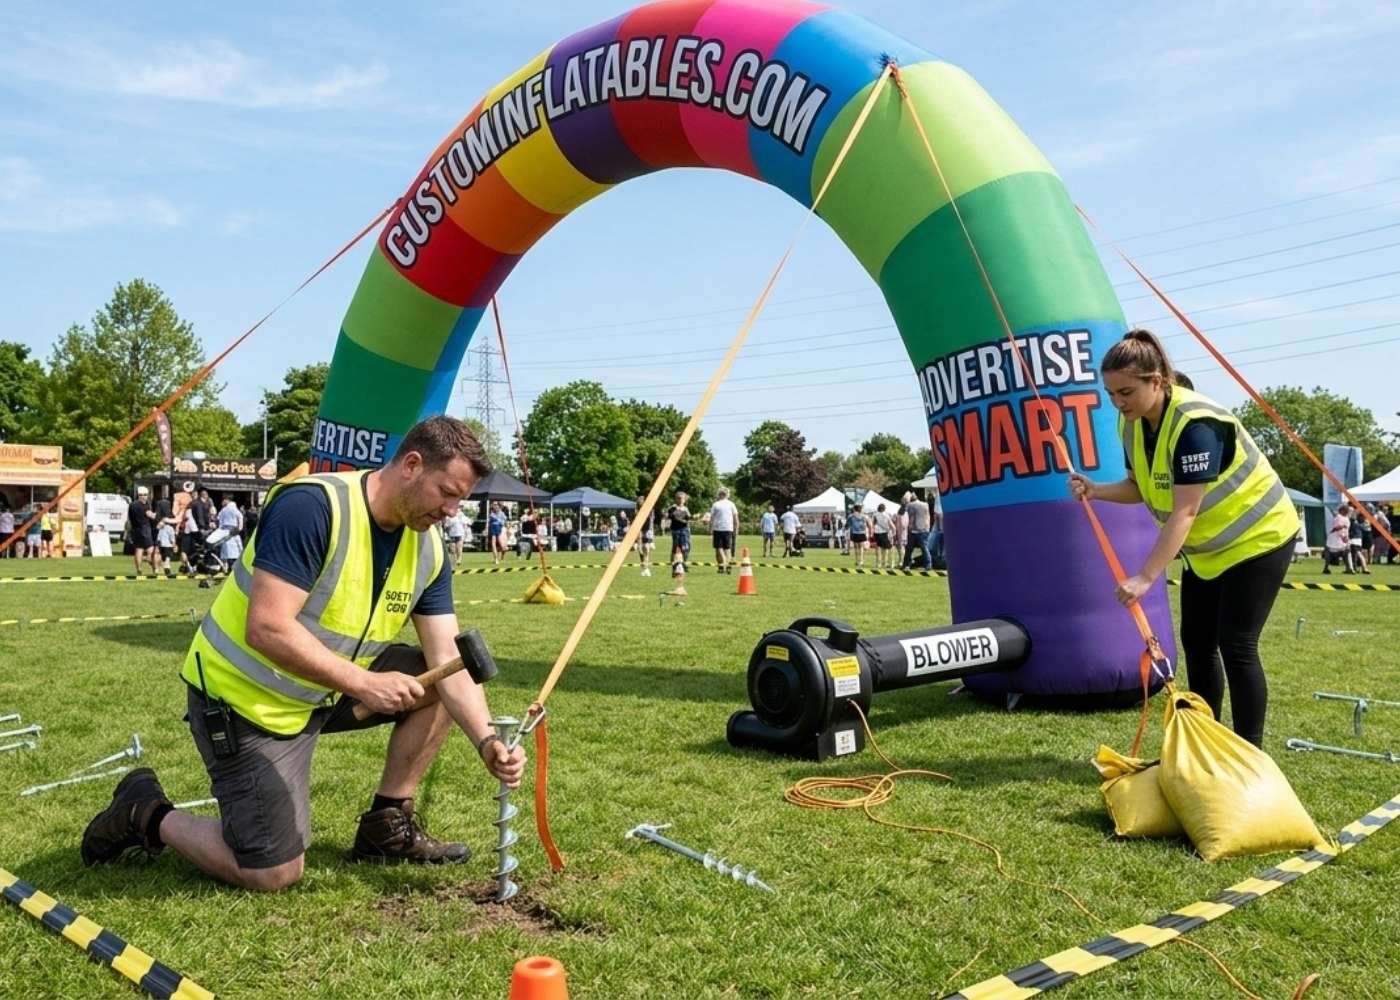
On grass or compacted soil, steel spiral stakes driven at a 45-degree angle into the ground provide the strongest hold. Use stakes rated for the weight and wind-load specification listed in your inflatable's documentation. Connect tether lines from each D-ring on the inflatable to a stake, keeping lines taut but not so tight that they distort the inflatable's shape.
On hard surfaces, fill sandbags or purpose-built weight bags to the manufacturer's recommended weight and secure them to each anchor point with locking carabiners.
For extra-large inflatables, combine both methods where the terrain allows. Check every anchor point again after full inflation, because the tension distribution changes once the structure is fully pressurized.
Safe Inflation and Blower Operation
Inflation is the most dynamic phase of the setup, and it is the moment the structure is most vulnerable to positional shifts and fabric stress.
Connecting and Starting the Blower Correctly
Attach the blower tube securely to the inflatable's air intake before you power the blower on. A loose connection at startup can allow the tube to detach under pressure, causing the inflatable to rise unevenly.
Once connected, power on the blower and step back to observe the initial inflation. Stand to the side rather than directly in front of or behind the inflatable so you have a clear view of the entire structure as it rises. Have a second person present to watch anchor lines and call out any tension issues on the opposite side.
Monitoring Pressure and Fabric Stress During Inflation
As the inflatable fills, watch for areas that appear over-tight or for seams that bulge more than usual. Most inflatables reach full pressure in two to five minutes. If you notice a section that inflates significantly faster than the rest, stop the blower and inspect that area for a possible blockage in the internal baffling.
Do not exceed the manufacturer's recommended operating time for continuous blower use. For events longer than a few hours, a continuous-run blower rated for extended operation is the appropriate choice rather than a standard short-duration model.
Post-Inflation Safety Checks Before the Event Begins
Once fully inflated, walk the entire perimeter and check that no tether line has gone slack, no stake has been pulled, and no part of the inflatable contacts an obstacle. Confirm the blower intake remains unobstructed throughout the event. Place visible barriers or cones around the setup perimeter so that guests do not walk into tether lines, which are a trip hazard at ankle height.

Weather Awareness and Wind Safety Protocols
Weather is the variable you cannot control, but you can prepare for it. Most inflatable-related incidents at outdoor events come down to inadequate weather monitoring rather than equipment failure.
Understanding Wind Speed Limits for Inflatables
Most manufacturers set a maximum operational wind speed between 20 and 25 mph for standard advertising inflatables. Check your specific unit's documentation for the rated limit. Do not estimate wind speed by feel alone. Use a handheld anemometer or a reliable weather app with live wind data for your exact location.
Sustained winds approaching the rated limit are a signal to deflate proactively, not to wait and see. Gusts can exceed sustained speed by 30 to 50 percent, so if sustained winds are at 18 mph, gusts may already push the inflatable past its safe operating range.
Responding to Sudden Weather Changes
Set a clear internal protocol before the event starts. Assign a specific person to monitor weather conditions every 30 minutes and establish a wind speed threshold at which deflation begins automatically.
If a storm approaches, do not wait for official warnings before you act. Begin deflation early so you have time to secure the inflatable and blower before conditions deteriorate.
A deflated and tied-down inflatable survives a storm. An inflated one in high winds becomes a projectile.
Post-Storm Inspection and Re-Inflation Standards
After any significant weather event, repeat the full pre-setup inspection before you re-inflate. Rain can compromise anchor points, and wind stress can stretch or partially separate seams that looked fine before the storm.
Do not assume the inflatable is event-ready simply because it deflated and packed away without visible damage. Take the time to inspect again. A second inspection takes 15 minutes. A damaged inflatable mid-event takes far longer to manage.
Conclusion
Setting up a giant advertising inflatable safely is a process, not a single action. Every step, from location scouting and surface inspection to anchoring and weather monitoring, connects to the one before it.
Follow this process consistently, and your inflatable will perform the way it is designed to: as a powerful, attention-grabbing display that stays safely in place from the first minute of your event to the last.
Before you go:
You might also be interested in…
FOR PERSONAL USE ONLY – Please Read Freebies Terms of Use
(This post may contain affiliate links. For more information, see my disclosures here.)
~ SHARE THIS POST ~

Did you like this post? Do you know someone else who might enjoy it? Please take a minute to share it on Pinterest, Facebook, or your favorite social media… Thank you!













Planning your year as a caregiver? Learn how to organize caregiving expenses, appointments, routines, and respite while protecting your budget and energy.