How to Prepare Before Creating a Miniature Book Nook Display

A miniature book nook display is one of those projects that looks effortless once it's finished but requires a fair amount of groundwork before the first piece gets placed. Whether you're drawn to a cosy library scene or a whimsical forest hideaway, success largely depends on what you do before you pick up a single tool.
Preparation is not just about gathering supplies. It shapes the quality of your build, saves you time, and honestly makes the whole process far more enjoyable.
This guide walks you through everything you need to have in place before you start.
Choosing the Right Kit or Design Concept for Your Skill Level
Before you purchase materials or sketch a layout, you need to decide whether you want to build from a ready-made kit or create an original design from scratch. Both routes are valid, but they suit very different types of crafters.
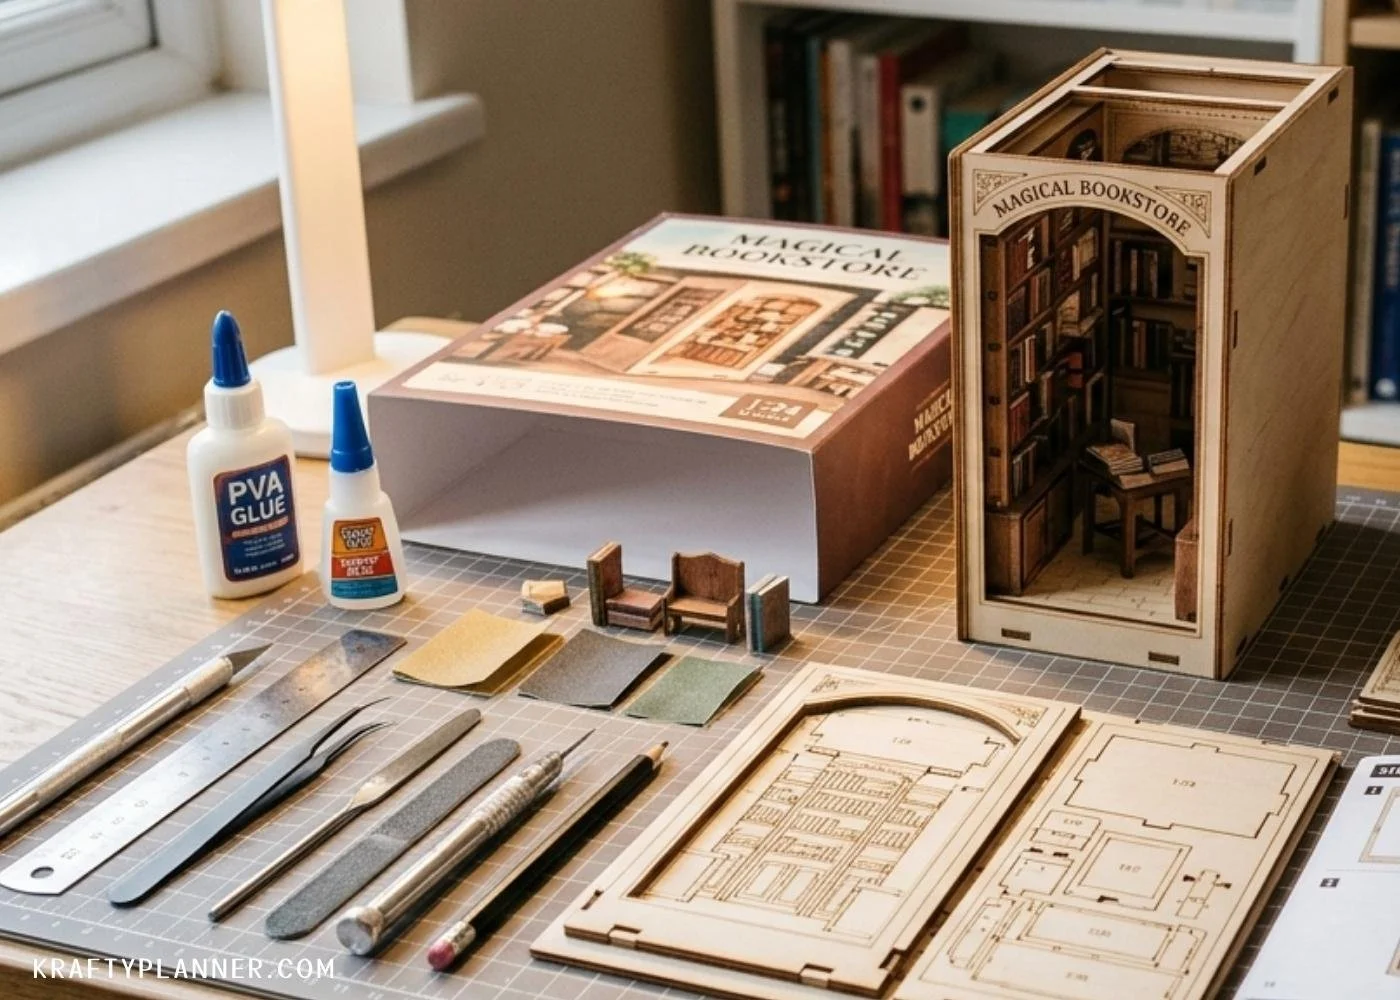
A structured kit is usually the better choice for beginners. It removes the guesswork around sizing, materials, and component compatibility. A well-designed book nook kit for adults by Figured'Art, for example, supplies pre-cut wooden panels, detailed instructions, and all the core decorative pieces you need to complete a themed scene. This means your focus stays on assembly and finishing rather than on sourcing individual parts.
If you have prior miniature or model-making experience, designing your own concept gives you full creative control. You choose the theme, the depth of the shelf insert, the colour palette, and every small detail. But this approach demands more planning time upfront and a stronger understanding of scale.
Regardless of which path you take, be honest about your skill level. A design that is too complex for your current abilities will frustrate you midway through. Start at a level that challenges you slightly without overwhelming you, and your finished display will reflect that patience.
Essential Tools and Materials to Gather Before You Begin
Cutting, Shaping, and Precision Hand Tools
Having the right tools ready before you start saves you from stopping mid-build to hunt down something you forgot. For a miniature book nook, precision matters more than force, so your tool selection should reflect that.
A sharp craft knife or scalpel is non-negotiable. Alongside it, you'll want a self-healing cutting mat to protect your workspace and keep cuts clean. A metal ruler helps with straight edges, and a set of tweezers is invaluable for placing tiny components that your fingers simply cannot reach with accuracy.
For shaping wooden pieces, a small file or sandpaper in varying grits will smooth rough edges and help parts fit together properly. If your build involves drilling, a pin vice or micro drill gives you far more control than a standard drill. Collect these tools in advance so they're within reach from the moment you begin.
Adhesives, Paints, and Finishing Supplies
Not all adhesives work the same way on miniature builds. PVA glue is a go-to for wood-to-wood bonds and works well for paper elements, too. Super glue is better for instant, small-point bonds, particularly on delicate pieces where clamps aren't practical.
Keep both on hand.
For paints, acrylic is the standard choice. It dries quickly, is water-based, and layers well.
Gather a set of fine brushes in multiple sizes, including at least one very fine detail brush for intricate elements. You'll also want a palette, a small cup for water, and a sealing varnish to protect your finished surfaces from dust and handling.
Setting Up the Ideal Workspace for a Miniature Build
Your workspace has a direct impact on the quality of your work. Miniature builds involve small parts and fine details, so the environment around you matters just as much as the tools in your hands.
First, prioritise good lighting. Natural light is ideal, but a daylight LED lamp works well as a supplement or replacement. Poor lighting leads to misaligned pieces and paint errors that are difficult to fix once the adhesive sets.
Your work surface should be stable and clutter-free. A dedicated table or desk is far better than a shared surface like a kitchen counter. Keep a tray or shallow box nearby to catch small parts that roll or fall during assembly. Losing a tiny component mid-build is frustrating and, in some cases, unavoidable without containment.
Organisation matters too. Sort your materials into small containers or compartmentalised storage before you start. Labelling each compartment removes the need to rummage around and keeps your build sessions focused. Plus, make sure you have tissues or a lint-free cloth close by for quick clean-ups during painting.
Finally, consider ventilation. Some adhesives and varnishes release fumes, so work near an open window or in a room with good airflow.
Planning Your Theme and Reviewing Instructions in Advance
The theme of your book nook sets the tone for every decision you make during the build. Hence, it deserves careful thought before you lift a tool. A well-chosen theme gives your display a sense of story and purpose, and it keeps your choices consistent from the lighting to the colour scheme to the smallest prop.
If you use a kit, the theme is already established for you. Even so, take time to personalise it. Think about whether you want to add extra elements, swap out colours, or adjust the layout to better suit your shelf space.
For original designs, gather reference images to give your concept visual clarity. Mood boards, whether digital or physical, help you see how different textures, tones, and elements will interact inside a small, framed space.
Beyond the theme, read through all instructions before you touch a single material. This step is easy to skip but genuinely important. A full read-through lets you understand the build sequence, spot any stages where you'll need extra dry time, and identify steps that require two pairs of hands or a specific technique. You may also discover that certain components need to be painted before assembly rather than after, which completely changes your order of work.
Note down any questions or uncertainties before you start. With that knowledge in place, your build will flow far more smoothly from start to finish.
Conclusion
Good preparation turns a miniature book nook project from a stressful experience into an enjoyable one. By choosing the right kit or concept, gathering your tools in advance, setting up a proper workspace, and reviewing your plan thoroughly, you give yourself the best possible foundation.
Take the time to prepare well, and the build itself will be far more rewarding from the very first step.
Before you go:
You might also be interested in…
FOR PERSONAL USE ONLY – Please Read Freebies Terms of Use
(This post may contain affiliate links. For more information, see my disclosures here.)
~ SHARE THIS POST ~

Did you like this post? Do you know someone else who might enjoy it? Please take a minute to share it on Pinterest, Facebook, or your favorite social media… Thank you!